Those toxins eat through flesh like a hot knife through butter.
Die-hard VALORANT fans will remember how dominant Viper was a few episodes ago. These days, the American chemist remains a viable option for just about any map in VALORANT but is no longer the must-pick Agent she used to be in the past.
Do not let that sway you from playing Viper on Pearl – Viper’s Toxic Screen can easily cover multiple angles on A-site, and she can easily split up B-site to help make site entry easier for her team. Despite the nerfs, her post-plant game is still one of the most powerful in VALORANT, thanks to her long-duration molly in Snake Bite.
This guide has compiled the best Viper Snake Bite Lineups you can try on Pearl to secure post-plant for your team.
Viper Snake Bite Lineups on Pearl A-site
Viper Snake Bite Lineup on Pearl A-Default from A-Main
A-Main is the most common post-plant spot for the Attacking team on Pearl. After all, A-Main offers a direct sightline towards A-Default, making it very easy for the Attacking team to peek towards the bomb post-plant.
As Viper, you can easily face A-Default and fire your Snake Bite molly towards the location. However, this puts you at an unnecessary risk since you must peek into the open to launch the molly.
- Stand in this corner at A-Main:

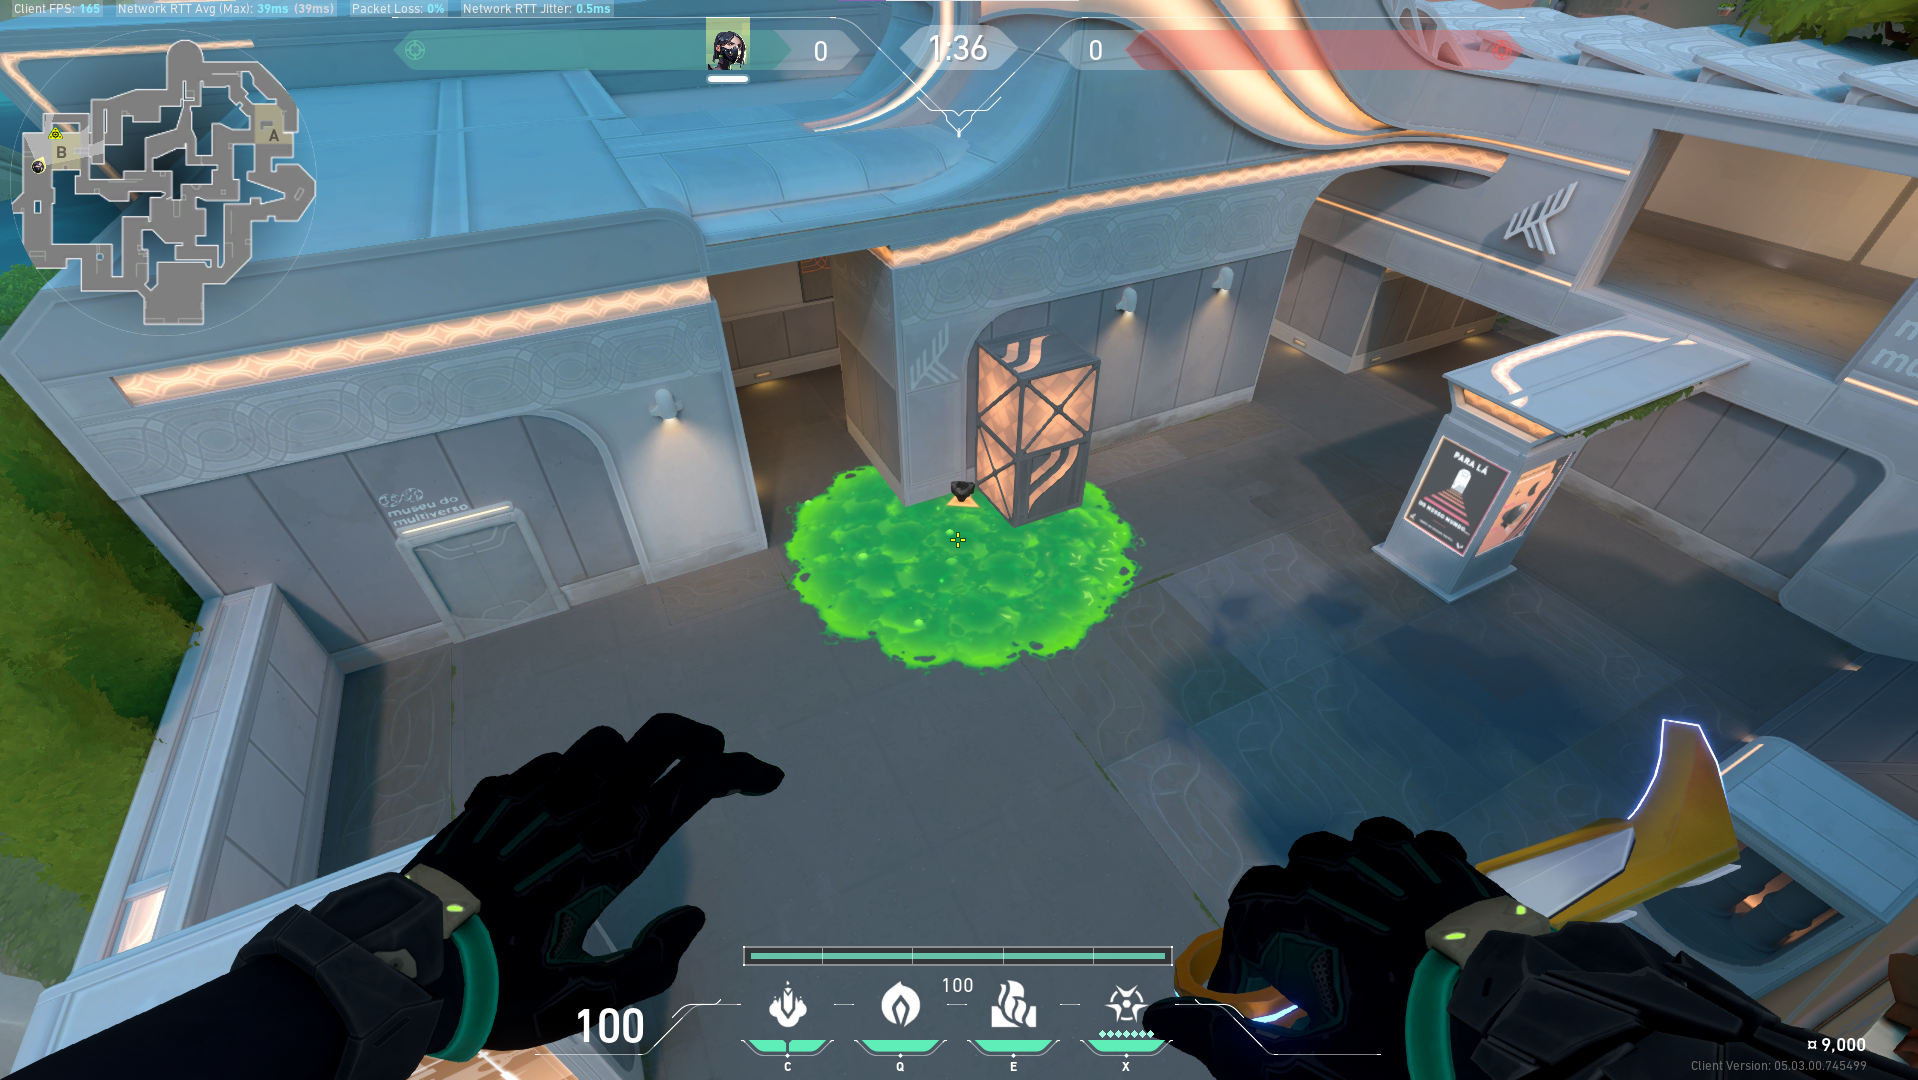
2. Place the upper right corner of the Snake Bite mouse click indicator against this corner on the pillar:


3. Fire Viper’s Snake Bite:

When done properly, Viper’s Snake Bite should land at Pearl A-Default:

Viper Snake Bite Lineup on Pearl A-Default from A-Link
A-Default is the best plant spot for A-site, and this is where 90% of your team’s Spike plants will end up throughout the match.
With that said, once the enemy team figures out where you position yourself for your Snake Bite lineups, they will want to push you out on post-plant to delay your post-plant molly.
The solution is an alternate Snake Bite lineup for A-Default. Try this one from A-Link.
- Stand in this corner at A-Link:

2. Place the crosshair icon in the Snake Bite mouse click indicator on this corner on the wall:


3. Fire Viper’s Snake Bite:

When done properly, this lineup should land at Pearl A-Default:

Viper Snake Bite Lineup on Pearl A-Default from Defender Spawn
This lineup will arguably be the least used lineup for A-site since Defender Spawn is one of the main rotational lanes towards A-site. As such, you’re likely to encounter a Defender or two coming from B-site.
Depending on how the round plays out, this Defender Spawn Snake Bite lineup might still come in handy.
- Stand in the middle of this small pillar at Defender Spawn:

2. Place the bottom right corner of the toxin fuel gauge on the upper right corner of this window on the building:

3. Fire Viper’s Snake Bite:

When done properly, Viper’s Snake Bite should land at A-Default with no problems:

Viper Snake Bite Lineups on Pearl B-site
Viper Snake Bite Lineup on Pearl B-Default from B-Ramp
B-Ramp is a long way out from B-Default, but because of how B-Default is positioned, you can still see the Spike on post-plant even from back at B-Ramp.
Not only can you actively defend the Spike from B-Ramp as Viper, but you can also line up a Snake Bite molly or two to help delay the Spike defuse.
Viper Snake Bite Lineup on Pearl B-Default From Defender Spawn
This following lineup is purely situational as the Defenders might take Defender Spawn to rotate over to B-site, making this position a dangerous spot to line up your Snake Bite mollies.
However, there will be rounds where the Defending team takes the longer route at B-Ramp to try and retake B-site. This lineup should come in handy for those situations.
- Stand in this corner at B-Ramp:

2. Place the upper right corner of the Snake Bite mouse click indicator in this corner on the wall:


3. Fire Viper’s Snake Bite:

When done correctly, Viper’s Snake Bite should land at B-Default:

Viper Snake Bite Lineup on Pearl B-Default From B-Link
B-Link can be a perfect position when playing post-plant on B-site. Having a post-plant Snake Bite lineup from this position can help you double down on B-site post-plant control and cut off any Defender rotating to B-site.
- Stand in the middle of this left door sill at B-Link:

2. Place the bend on the HP hud line on this corner of the stacked boxes:


3. Fire Viper’s Snake Bite:

When done correctly, Viper’s Snake Bite molly should land at B-Default with no problems:

Poisonous Defense
Viper’s Snake Bite molly is a powerful post-plant utility that can almost always guarantee a post-plant win. Each Snake Bite charge can last for up to 5.5 seconds each, and with two in Viper’s kit, you can delay the Spike defuse by up to 11 seconds – a very long time in a low-time-to-kill game such as VALORANT.
Pearl’s relatively open skybox opens up a world of possibilities regarding Snake Bite lineups. Learn all the ones featured above to secure your team’s post-plant play on VALORANT’s latest map.
Visit the PlayerAssist website for more Gaming Guides, Gaming News, Game Codes, and other Gaming Content!


