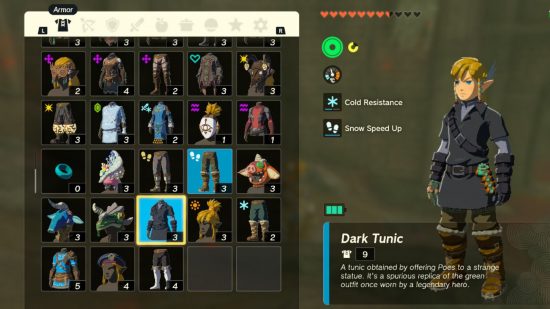
The Legend of Zelda: Tears of the Kingdom armor offers two benefits: defence and style. Sure, you take less damage in better outfits, but you also get to look good doing it. So, you probably want to hunt out all the best bits.
That’s where we come in – we’ve found a few bits of TotK armor so far and will keep updating this guide as we find more. There’s a lot to find, so be sure to check back often for the new bits we discover, and check out our Zelda: Tears of the Kingdom review to learn even more about the world of Hyrule. We’ve got a specific guide if you’re on the hunt in Zelda: Tears of the Kingdom’s Misko’s treasure quest – that’s more the fashion side of things than the hardy warrior vibe as far as we can tell.
Anyway, here’s the Zelda: Tears of the Kingdom armor we’ve found so far:
Zelda: Tears of the Kingdom best armor set
This has a situational answer, depending on what you’re doing, but there are some sets that are better than others in terms of functionality and defence. Of course, if you prefer something for its aesthetics, that’s ok too!
The best armor in terms of defence is still the Soldier’s armor, but in terms of most functionally helpful armor, the new Glide and Miner sets are definitely our favourites.
Zelda: Tears of the Kingdom Archaic armor location
There’s various Archaic armor scattered throughout the Great Sky Island – the opening tutorial segment of the game. Link starts out without any clothes, so you want to cover his shame pretty quickly.
You find the Archaic legwear first – it’s just in a chest on the main path. It’s a little while longer before you find the Archaic Tunic, however, so don’t worry if you think you missed it! Just keep your eyes peeled for chests on the Great Sky Island. Here’s the Zelda: Tears of the Kingdom Archaic armor we’ve found so far:
- Archaic Legwear (Great Sky Island)
- Archaic Tunic (Great Sky Island)
- Archaic Warm Greaves (Great Sky Island)
Zelda: Tears of the Kingdom Snowquill armor locations
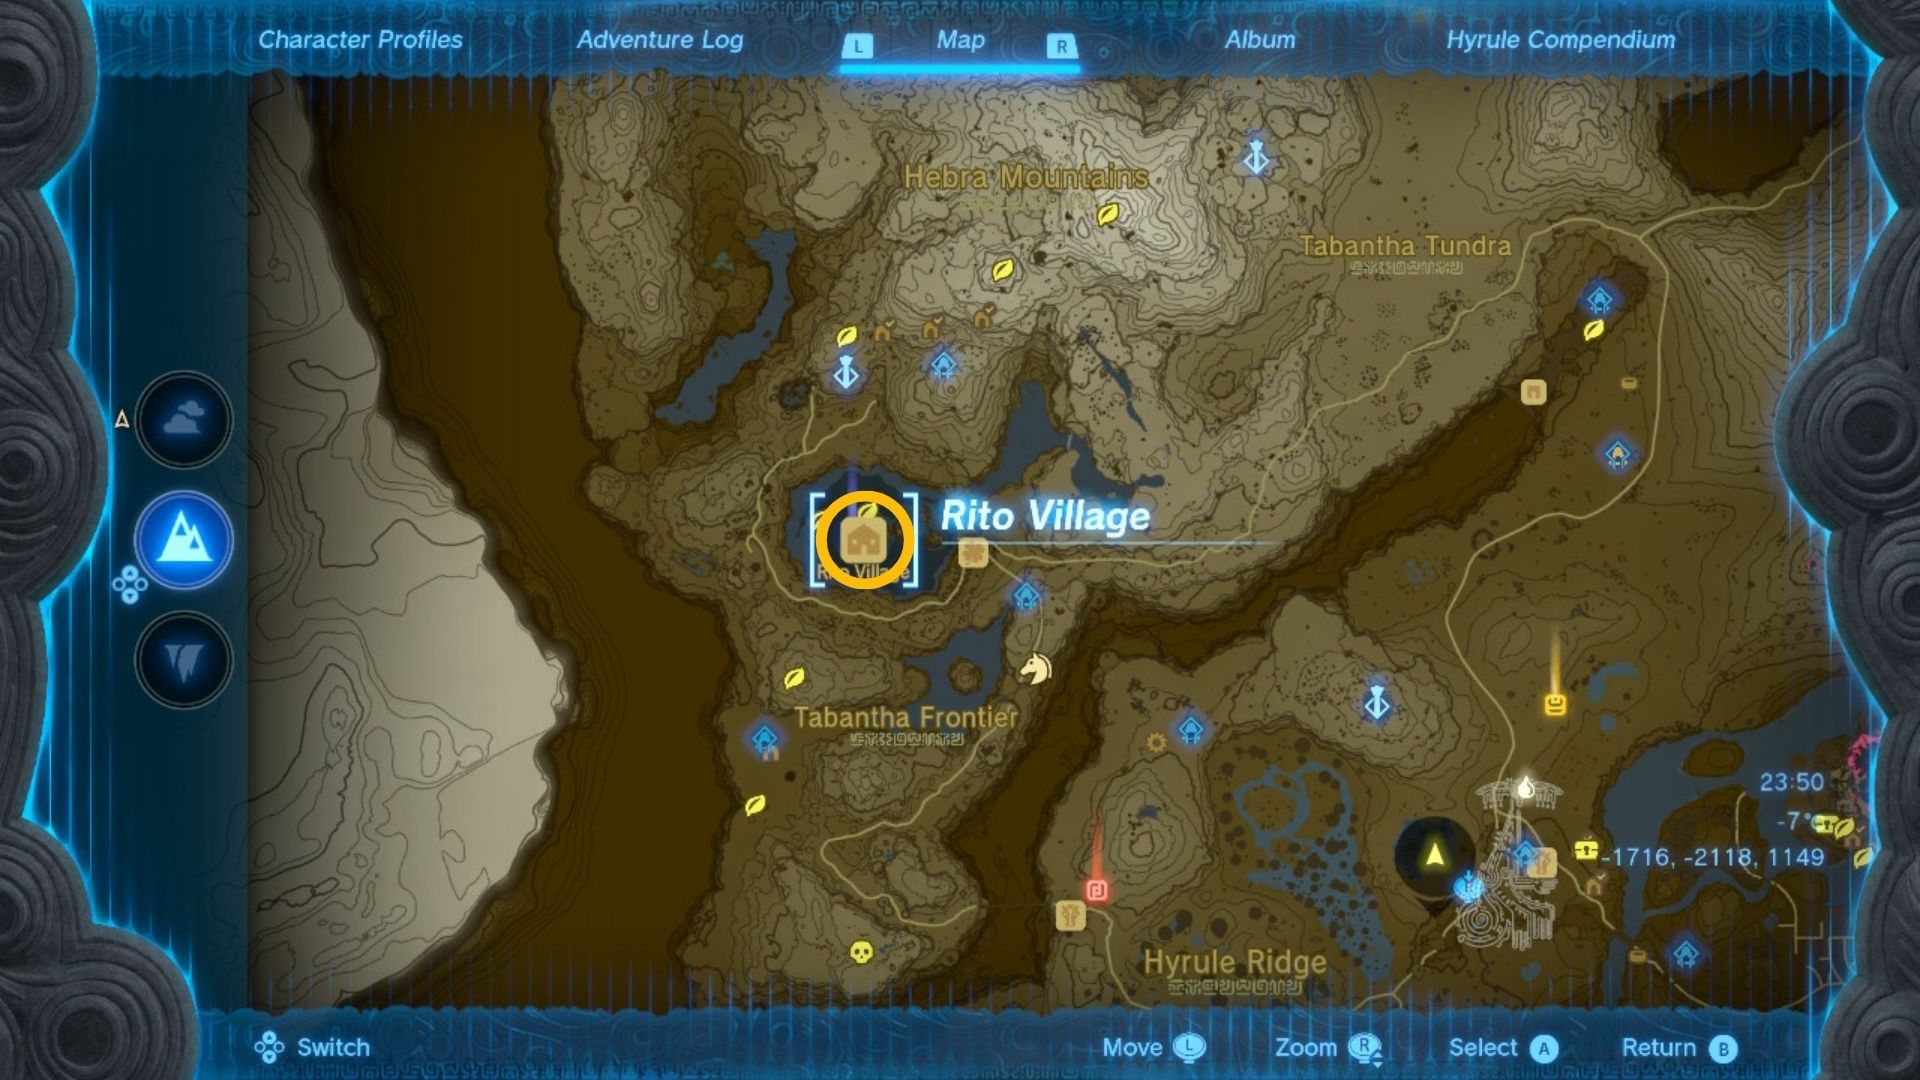
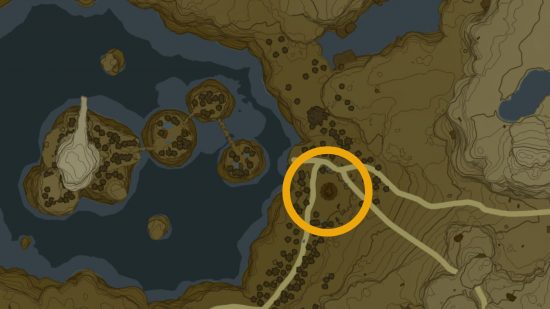
The Snowquil Armor is super easy to find, but it doesn’t come cheap. Head to Rito Village in the northeast of the map – you have a marker set for it after meeting Purah in Lookout Landing – and just head to the shop there. Make sure you have some rupees as the trousers alone take 1,000 of them.
You can see the location of the Rito Village armor shop in the photo above. The set offers cold resistance which is essential to completing the Rito Village mission with Tulin as it takes you high up to the Hebra peak and beyond.
Zelda: Tears of the Kingdom Miner’s armor locations
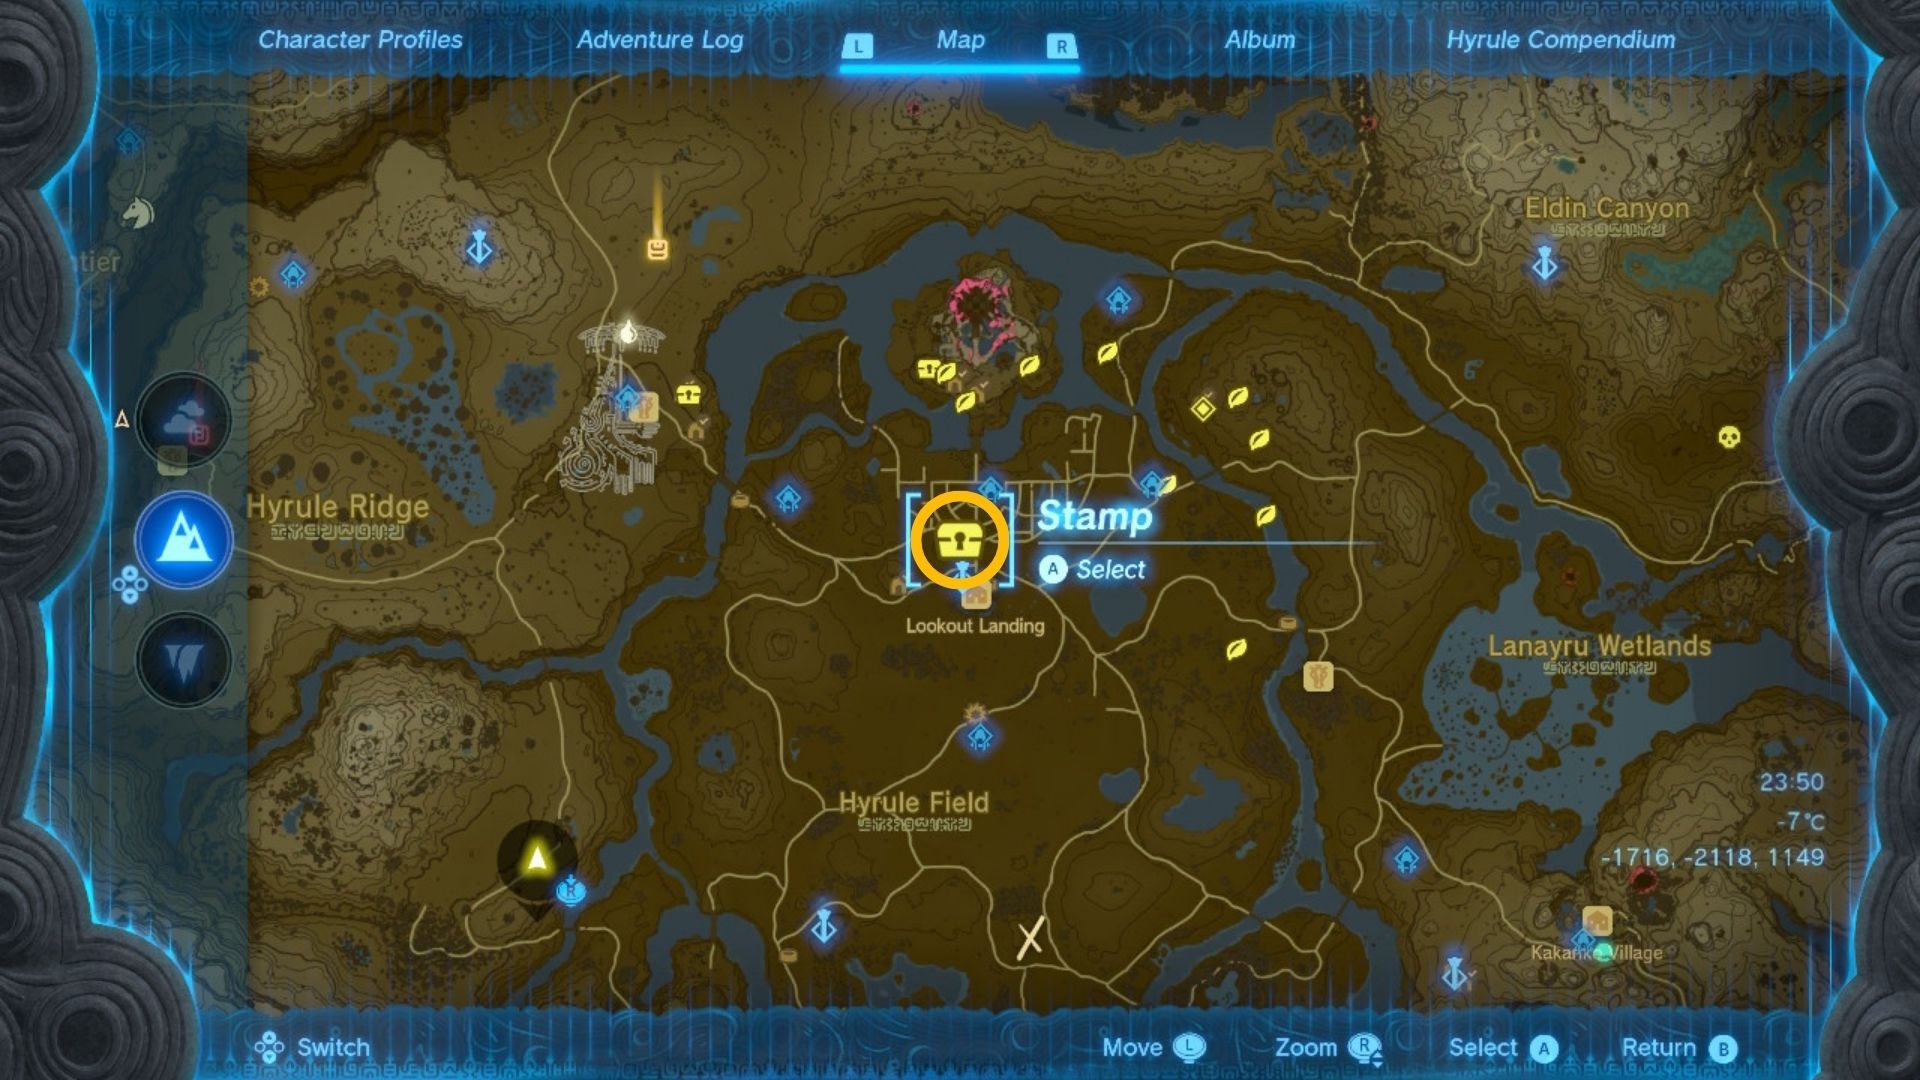
You can get maps to lead the way to these pieces, or find them yourself accidentally like we did. We’ve found the Miner’s mask, top, and trousers in the depths at the locations marked with the treasure chests above. It helps you out in the dark underbelly of Hyrule by shining a light around you, so does come in handy.
Zelda: Tears of the Kingdom Soldier’s armor locations
The Soldier’s armor set can be found through the secret passage in Zelda: Tears of the Kingdom’s Lookout Landing – head through the secret passage that appears after completing a little bit of the game. Be warned, this passage takes a lot of rock-breaking tools to get through – come prepared.
Zelda: Tears of the Kingdom Royal Guard armor locations
All pieces of the Royal Guard armor are in the castle. Head to Hyrule Castle and you find the Royal Guard Boots in the King’s study, the Royal Guard Uniform hidden in the Guard’s Chamber, and Princess Zelda’s room holds a chest with the Royal Guard Cap.
Zelda: Tears of the Kingdom Climbing Gear locations
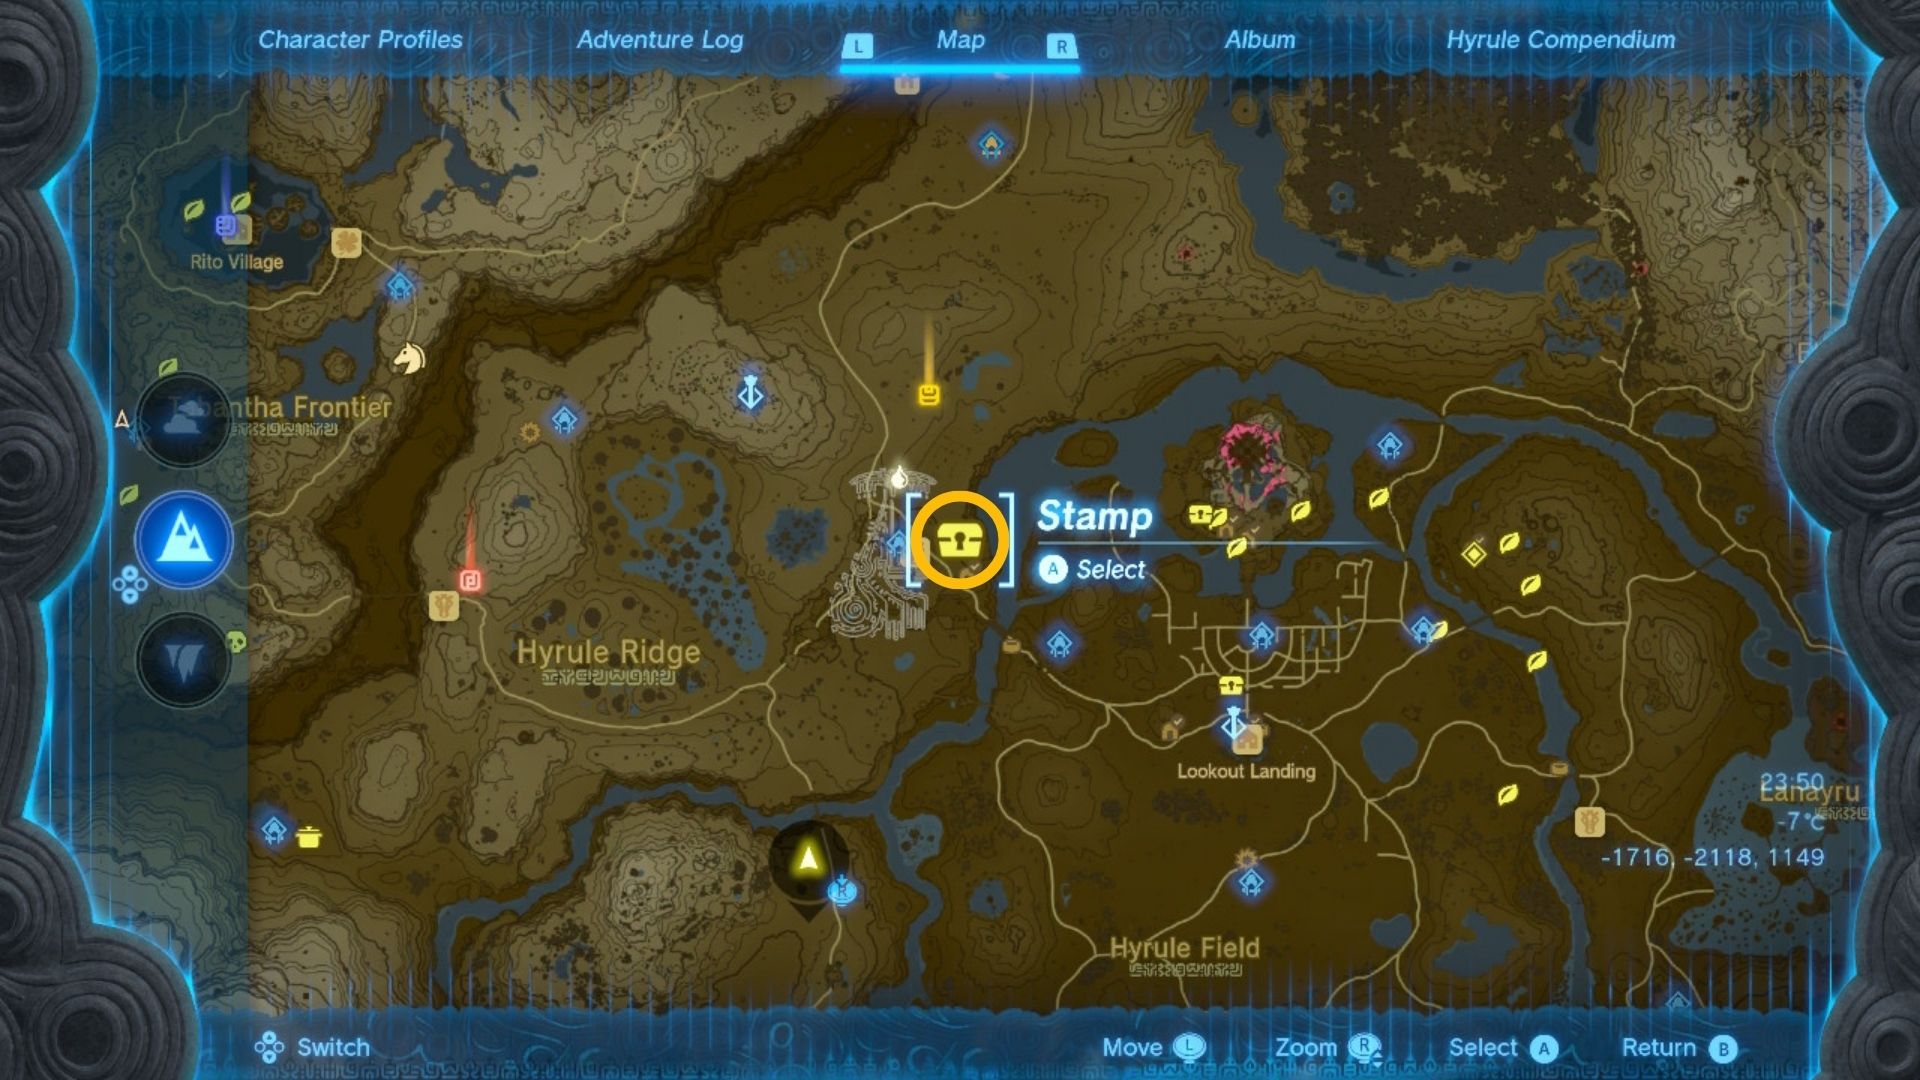
We’ve only found the main torso piece of climbing gear so far – you can see it marked in the photo above. It gives a boost to your climb speed so can be super helpful!
Zelda: Tears of the Kingdom Barbarian armor locations
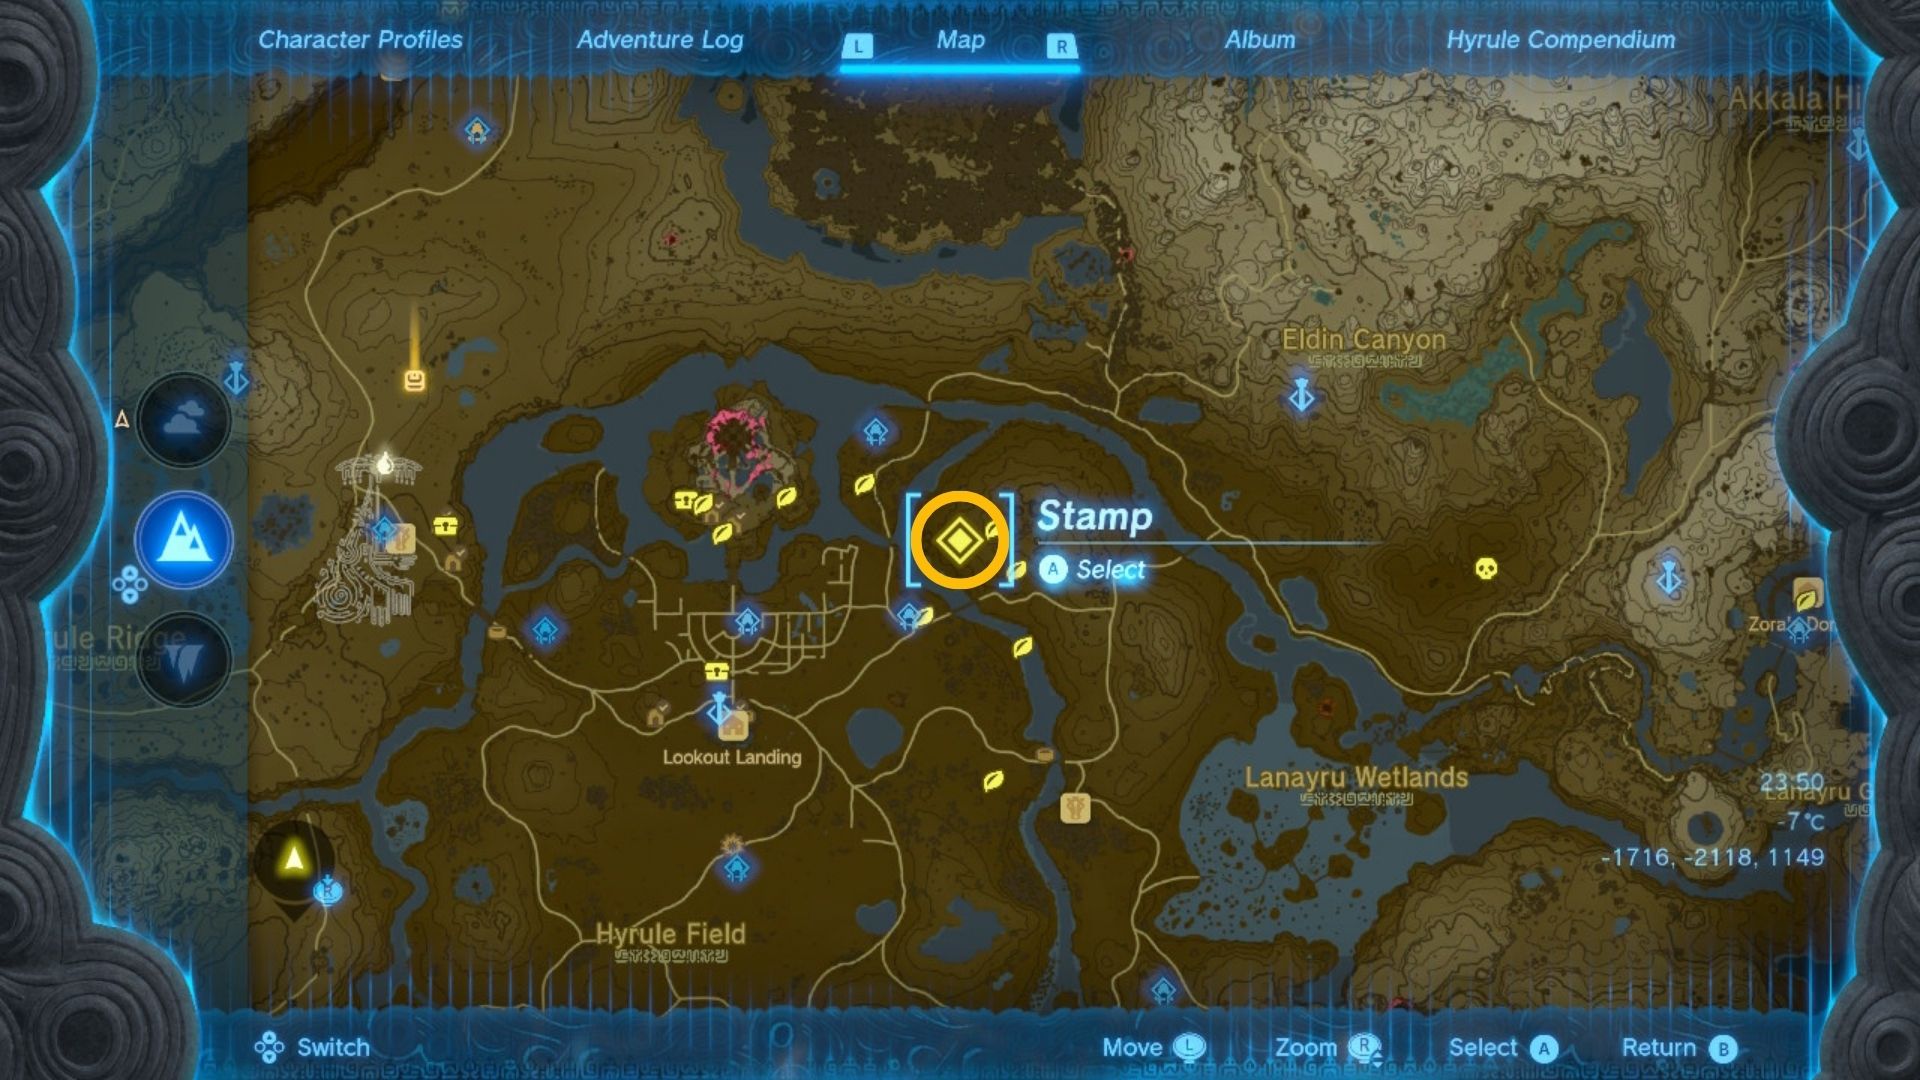
We’ve only found the main piece of Barbarian armor for the torso so far. It’s part of Misko’s treasure quest, and you can see the location marked up above.
Zelda: Tears of the Kingdom Desert armor locations
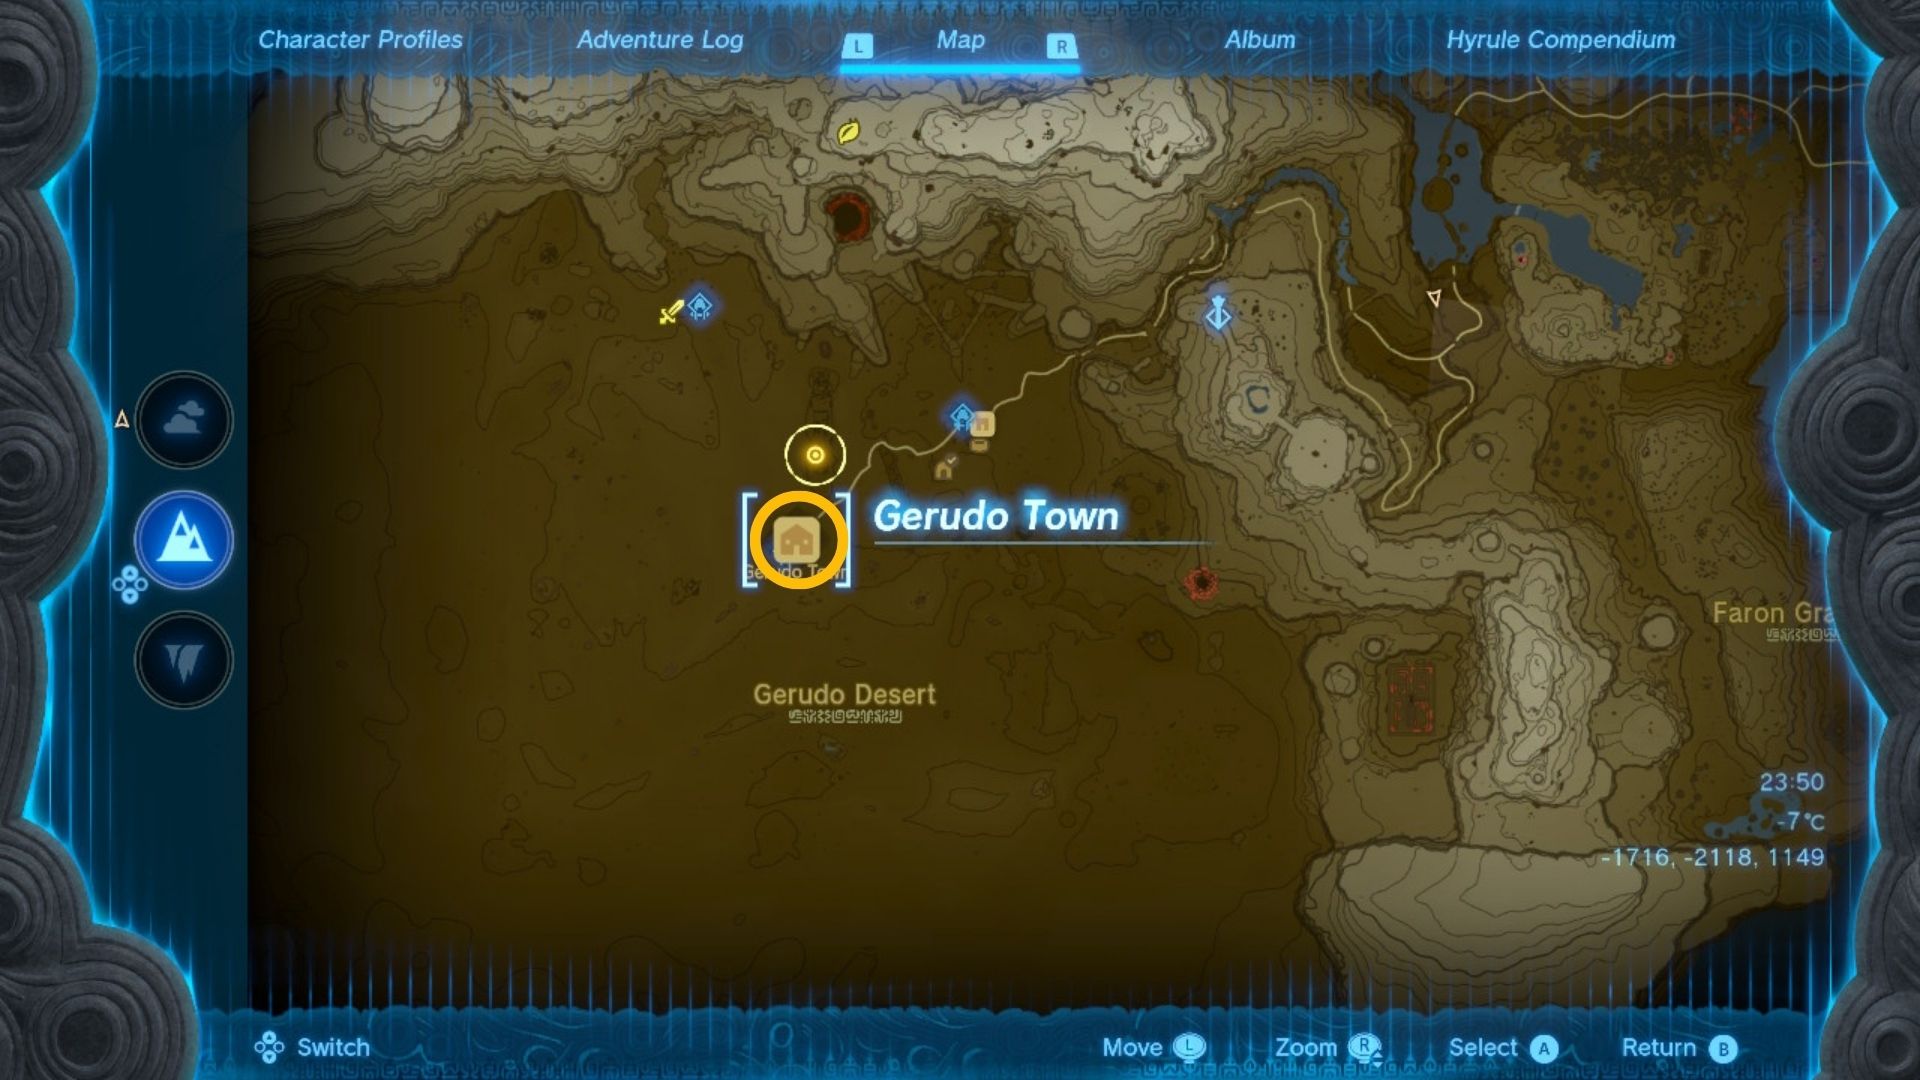
To beat the heat, you need the Desert Voe armor set. The three pieces are a bit tricky to find, though. The headband is for sale in Kara Kara Bazaar on the way to Gerudo Town. The pants and spaulder are a little harder to find. They’re sold in the secret shop in Gerudo Town, which you’ll need to ascend into from a cave below the first time. Once you unblock the door, you can re-enter any time. To find your way to the store, follow the steps below.
- Begin at the entrance to Gerudo Town and jump down into the sewers
- Swim until you see a cracked wall and use a fused weapon to break it down
- Work your way through the sewers, turning right at the splitting paths and continue to break down boulders in your way
- When you reach a small room with broken pillars, use the ascend ability on the roof
And you’re in! Now, shop til you drop.
Zelda: Tears of the Kingdom sand boots and snow boots location
Rather than completing quests to unlock the sand boots and snow boots in Tears of the Kingdom, you buy them from the Gerudo Secret Club shop, same as the Desert Voe garb. You can pick up the sand boots for 1,200 rupees and the snow boots for 1,300 rupees.
Zelda: Tears of the Kingdom jewellery locations
You can buy three different types of jewellery in Gerudo Town, once you find the Gerudo’s hiding place through the tunnels. You can see the location up above.
Zelda: Tears of the Kingdom Yiga armor locations
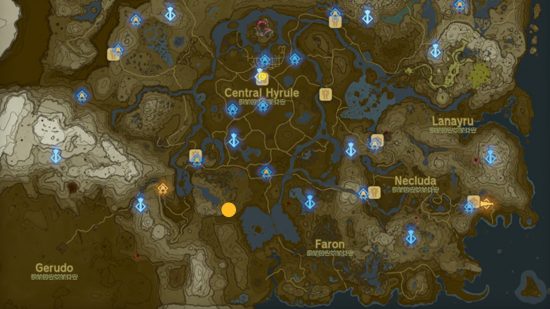
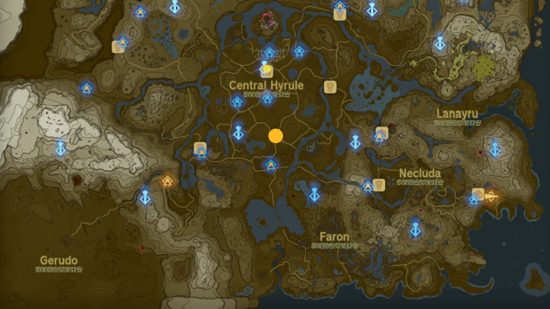
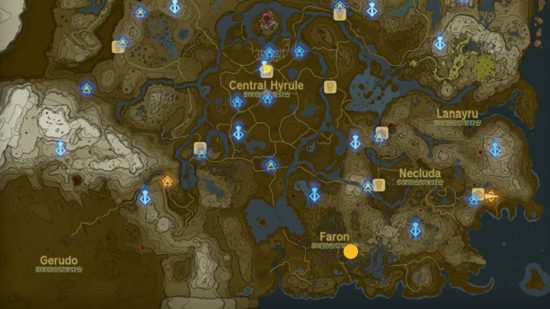
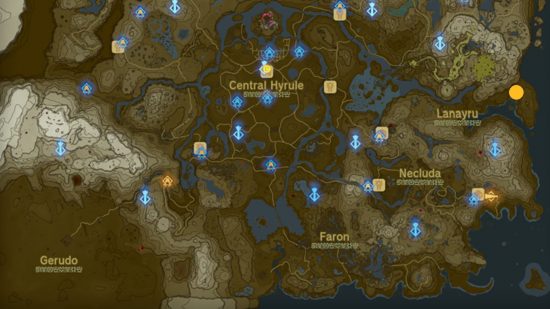
You can find the three pieces of the Yiga armor across Hyrule to form the full outfit. We’ve got locations for each below with a mango dot indication for where to search. First up is the headpiece, which you can find in a cabin south of Central Hyrule.
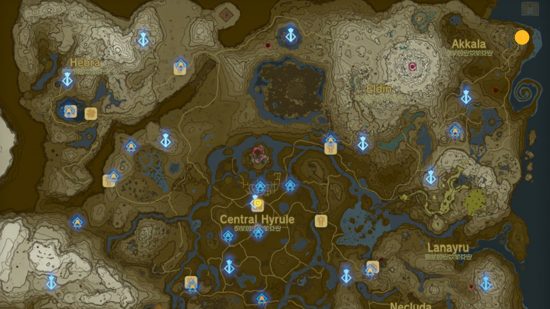
Next up is the chest piece of the Yiga armor set, available in the Akkala Lab in the far Northeast, marked in the photo above.
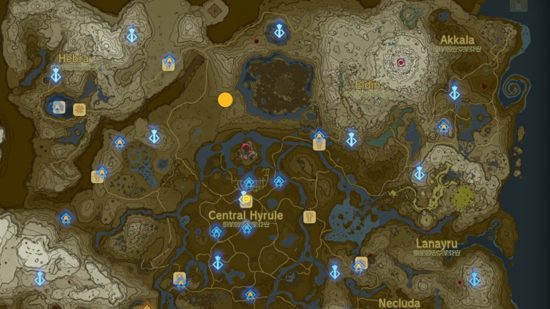
Finally, you can finish up the Yiga armor set by grabbing the legs in an area northwest of the Great Hyrule field, shown above.
Zelda: Tears of the Kingdom Zora armor
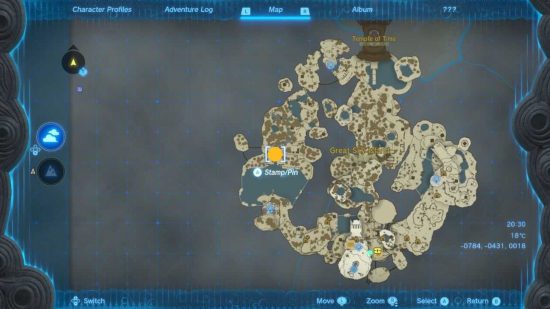
To pick up the Tears of the Kingdom Zora armor set, you need to seek out a specific quest. In Zora’s domain, find Yona sitting in a shallow pool among others. There she tells you that she needs to fix the armor, and requires you to fetch an ancient arowana fish to do so. Fortunately, we know where to get one, so return to the sky island from the start of the game and make your way to the waterfall we’ve highlighted in the map below in mango, then shoot arrows into the water until the fish is yours. Return to Yona, and you get the Zora chest piece.
To get the rest of the Zora armor, you first need to complete the water temple challenge. If you have, head to Zora’s Domain and speak to the two soldiers in the right corner having a conversation. Thus begins a quest to find the final pieces of the legendary armor.
First, you need to hunt down the headpiece, which you can find inside Floating Scales Island (the sky island almost directly above Tal Tal Peak). On the island, scope out the sides of the floating rock to find an entrance, then simply glide down, run through the area, and pick up the help.
Once you have the help, last up it’s the Zora greaves. To find these, head to the Ancient Zora Waterworks and delve deeper through the area until you reach the cavern with all the waterfalls in it. Check behind the waterfall directly in front of you as you land facing forward in the cavern to find the greaves.
Zelda: Tears of the Kingdom Rubber armor
The rubber armor is key to surviving a lot of electric enemy’s ranged attacks. Here are the three pieces locations:
For the chest piece of the rubber armor, head to the area in-between Lake Kolomo and Whistling Hill to find the Teniten shrine. From there, go north until you notice a rock blockade covering a cave. Smash the block, and go through the cave until you take on the thunder Like Like. Behind the fallen Like Like there’s another smashable wall, smash that in and keep walking for the rubber armor chest.
To get the rubber helm, head to Sarjon Woods in the far south and find the Sarjon Woods Cave along the Floria River. Swim through the cave, avoiding the Horroblins and Like Likes on the way. Eventually, you reach a waterfall, but don’t be scared! Fall down and find the rubber helm.
The final piece of the rubber armor set is in the Horon Lagoon Cave, just to the west of Talus Plateau. Once again, it’s a simple case of making your way through the underground section to find the item, though this time there’s much less in the way. Grab the rubber tights and the full rubber armour set is yours!
Zelda: Tears of the Kingdom Champion’s Tunic
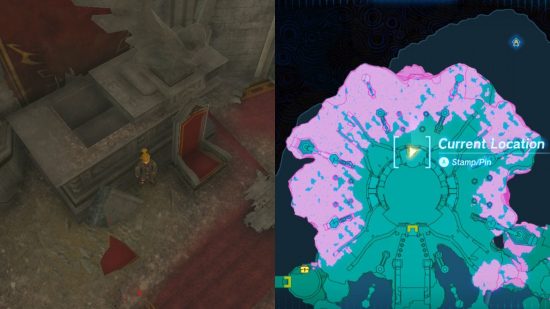
As you explore around Hyrule you may rediscover Link’s house. Around the back, there is a well – hop down it, and you find a secret room of Zelda’s. If you perhaps take a peek at her diary, you get the quest to find a brand new Champion’s Tunic hidden in Hyrule Castle’s throne room.
You get a clue as to what to do here, but to make it even simpler: light the two torches on either side of the throne in the Sacntum/Throne Room of Hyrule Castle, and a chest containing the tunic reveals itself.
Zelda: Tears of the Kingdom Mystic armor
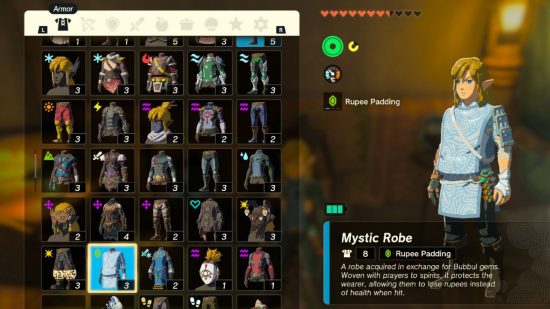
To get these snazzy blue robes, you need to trade with Kilton’s brother Koltin. In exchange for Zelda: Tears of the Kingdom bubbul gems, you get the Mystic Robe, Headpiece, and Trousers. These can negate some health being lost in battle, by spending your rupees instead. We’ll let you decide which is worth it.
To easily find Koltin’s store, head to the Ulri Mountain Skyview Tower at night – he parks up behind the tower to the right.
Zelda: Tears of the Kingdom Glide armor
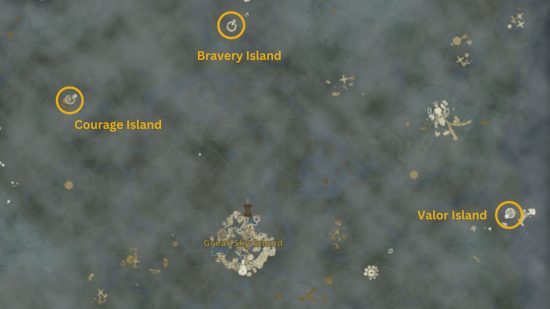
These three integral armor pieces require Link to take to the skies. Across the map, there are three islands: Bravery, Valor, and Courage, that house diving tests run by Zonai Stewards. To partake, it costs one Zonai charge. You must complete all three tests within 35 seconds. If you complete them, you get the Glide mask, tights, and shirt. The mask is a reward for the Valor Island test, the shirt for Courage Island, and the tights for Bravery Island.
Courage Island is right above Thundra Plateau, Bravery above the Lost Woods, and Valor above Lodrum Headland, in the South Lanayru Sky Archipelago.
Zelda: Tears of the Kingdom Frostbite armor
The easiest piece to acquire is the Frostbite shirt. Head to Brightcap Cave below Oromuwak shrine in Tabantha, and speak to the two girls outside. They’ll give you a quest to go into the cave and explore it. Within is a chest containing the shirt. Similarly, the fiesty, frosty headdress resides in Lake Kilsie Cave on the north coast of the lake, and the trousers of this set are in the Hebra Headspring Cave above Hebra Plunge.
We’re working on a map for this – hold tight for exact locations!
Zelda: Tears of the Kingdom depths armor
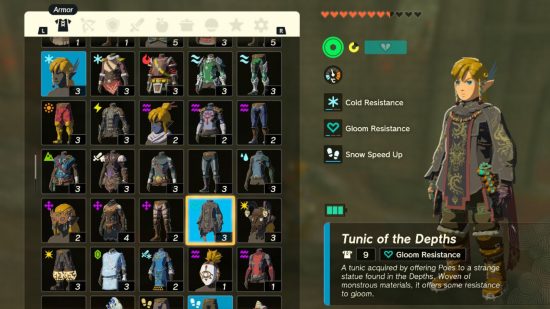
To get your hands on these helpful gloom-resistant clothes, you need a handful of Zelda: Tears of the Kingdom Poes and to head into the Depths. These items aren’t sold by any particular Bargained statues, instead, you need to have found two, then four, then six statues in order to get the pieces. These alternate with the Dark armor (see below).
The Hood, Tunic, and Gaiters of the Depths each cost 150 Poes from the statues.
Zelda: Tears of the Kingdom Dark armor
Like the armor of the Depths, the Dark armor is available from Bargainer statues. The Dark Tunic is purchasable from the Bargainer statue at Lookout Landing for 150 poes. The Tights and the Hat become available as you find three and then five statutes in the depths.
Zelda: Tears of the Kingdom Froggy armor
This sticky set comes as rewards from Traysi for Potential Princess Sightings quest progression, where Link chases down leads at stables with Penn the reporter. To start this quest, head to the Lucky Clover Gazette office on the way to Rito Village, in the location seen above.
That’s all the Zelda: Tears of the Kingdom armor we’ve found so far. For more, check out our Zelda: Tears of the Kingdom shrines, Zelda: Tears of the Kingdom koroks, and Zelda: Tears of the Kingdom geoglyphs guides.


